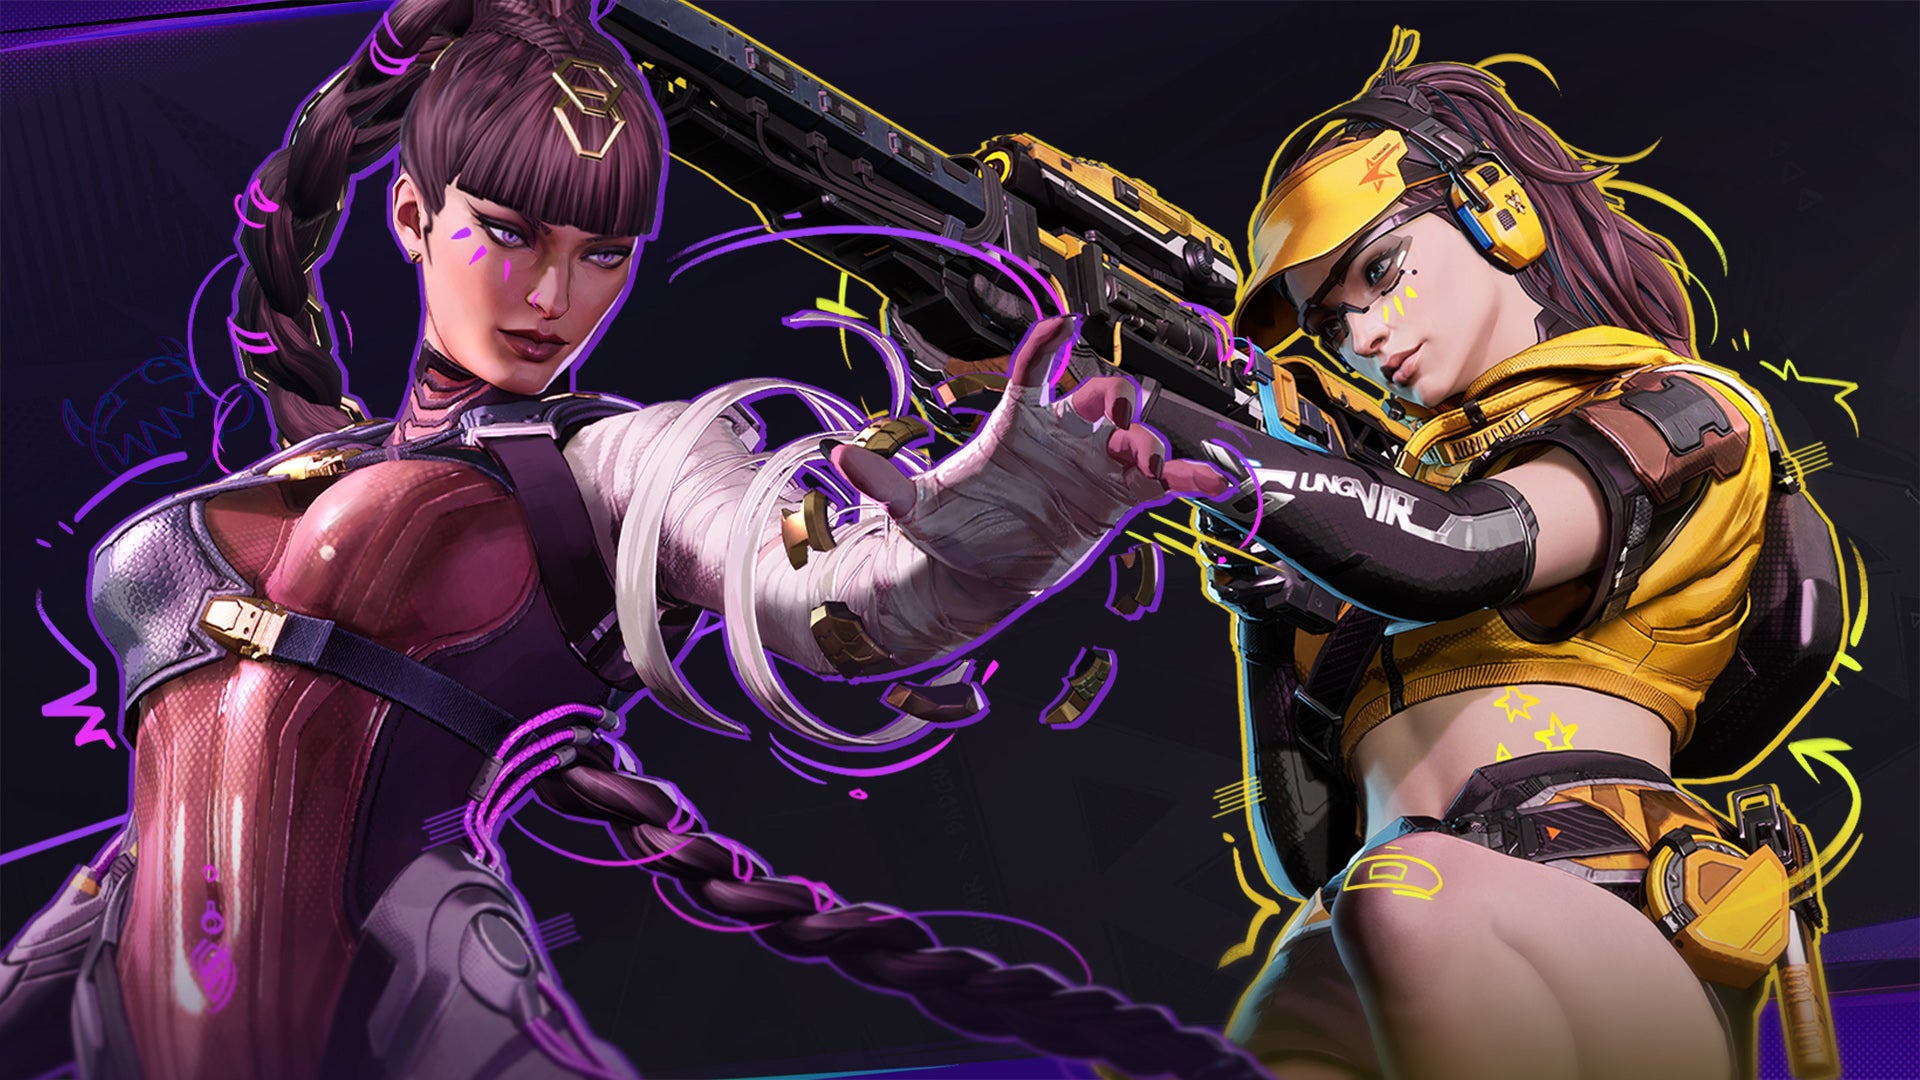
FragPunk is a 5v5 tactical hero shooter featuring 13 unique playable characters, known as Lancers. Each Lancer is equipped with at least three otherworldly Abilities, so whether you want to slide around the map with an electric guitar modified into a shotgun, teleport your entire team to quickly rotate to another site, or heal your allies after a narrowly won gunfight, there’s a Lancer for you.
FragPunk’s hero roster is mostly well-balanced at the moment, allowing all Lancers to thrive in optimal situations or when handled by players who recognize a character’s weaknesses and leverage their strengths. But that doesn’t mean all Lancers are created equal. While some may flourish on Attack or Defense, or when combined with specific team compositions or Shard Cards, others stand above the rest and provide consistent value no matter the circumstances.
Determining the best characters in the current meta is especially important in FragPunk because many of the game’s Lancers must be unlocked using Gold, FragPunk Coins, or Lancer Trophies. So before you spend your hard-earned Gold on the worst character in the game, this FragPunk tier list will break down every Lancer and place them in a tier from S to B based on their ease of use, versatility, and consistency of value:
FragPunk Tier List
S-Tier Characters: Nitro, Hollowpoint, Pathojen, Spider, Kismet
A-Tier Characters: Serket, Broker, Zephyr, Sonar, Corona
B-Tier Characters: Jaguar, Axon, Chum
S-Tier: Nitro
Nitro is a Lancer limited only by your imagination, and her lack of mobility options. Nitro’s Chug Chug deploys a remotely-controlled combat drone that can dish out 20 damage per projectile, but the drone’s greatest strength is its ability to gain intel while Nitro hides in relative safety. Nitro’s The Wall ability enables you to create unique and unexpected sightlines, climb onto otherwise inaccessible areas, block incoming damage, and force enemies to reveal their location as they spray to destroy these surprisingly sturdy shields.
Nitro’s Mr. Pewpew sentry turrets can monitor most doorways and entry points, and they can also be used as a sneaky offensive tool. Use them to guard flanks, or when you know an enemy is expecting your advance, toss a turret in line of sight of your foe. This will force them to either accept the incoming damage from the turret, or they’ll turn to destroy it, opening up a brief window for you to peek and gun them down.
S-Tier: Hollowpoint
Hollowpoint is a gifted sniper that provides players with a supercharged railgun that can one-shot enemies to the body in medium-range duels, or one-tap enemies to the head from just about anywhere. Hollowpoint’s Meteora railgun is also a great recon tool because aiming down sights detects enemies in the field of view, even if they’re an invisible Zephyr. The value of Hollowpoint’s Meteora simply cannot be overstated because it essentially acts as a second primary weapon, and as a free sniper rifle that disregards the Shard Clash rule that prevents you from selecting a weapon type after two deaths using them.
Hollowpoint’s Smoke Screen is among the best vision control abilities in FragPunk because it’s forward-moving, goes through walls, pings all enemies hit by the screen, and can be stopped at will to block off sightlines. Lastly, her Paparazzi trap is especially useful because it attaches to enemies and exposes them until they remove it by holding their interact key for a brief time.
S-Tier: Pathojen
Since this tier list is focused on highlighting the Lancers that provide consistent value regardless of your team composition, weapon, or Shard Cards, Pathojen’s AOE healing field all but automatically places her in S-Tier because it’s the only healing ability in FragPunk. While many Shard Cards can grant healing, increase your team’s Max HP, or reduce incoming damage, Pathojen’s Emotional Rescue ability bypasses the RNG Gods and ensures your team can restore their HP no matter what.
On top of that, her Shroom Wall is a respectable defensive tool that grants cover, creates blockades in narrow chokepoints, and completely blocks off doorways. Finally, Pathojen’s Killer Queen ability forges a triggered or manually activated trap. Killer Queen is perfect for slowing enemy advances, it can be used offensively by tossing it toward unsuspecting enemies, and don’t forget to place one on planted Converters to ensure enemies can’t defuse for free.
S-Tier: Spider
Spider may be the most controversial S-Tier pick on this list because his strongest ability, Teleporter, relies heavily on team coordination to extract maximum value. But because the Teleporter facilitates creative plays, safe disengages and full team site rotations, Spider’s potential is simply too high for a lower ranking. Meanwhile, Spider’s Spirited Away trap is a demoralizing ability that teleports enemies to the spot where the skill was initially cast. Catching an enemy with Spirited Away almost guarantees an easy charged knife kill or one-tap, but be sure to communicate with your team when teleporting more than a single target because you’ll likely require the follow-up.
Spider Trap is also an excellent defensive gadget that nearly covers an affected enemy’s entire screen for roughly three seconds while slowing them. Hide Spider Traps near choke points leading to your teleporters to prevent enemies from camping your TP.
S-Tier: Kismet
Kismet is an elite offensive Lancer in large part because of her Walk on the Wild Side ability that makes her invisible and invulnerable for a brief period. Walk on the Wild Side is the only movement ability in FragPunk that provides both invisibility and invulnerability, but you won’t be able to see enemies for its duration. Still, it allows you to sneakily cross wide-open sightlines or long corridors, before getting to cover. Walk on the Wild Side can also be used as a get-out-of-jail-free card, when cornered or low on HP.
Hello, Goodbye provides a short-range scan that penetrates walls, and though you may be unimpressed by this ability’s range initially, its effectiveness increases as you familiarize yourself with maps and common enemy angles. Kismet’s final ability, Misery Angel, is a complimentary one that can damage enemies regardless of intervening barricades. Misery Angel is a surprisingly lethal threat that deals close to 100 damage and has a large blast radius.
A-Tier: Serket
Serket is an all-around offensive threat that provides intel, can teleport, has a forward moving smoke, and an AOE crowd control tool. Serket’s movement ability, Station to Station, casts a controllable beacon that you can teleport to for a limited time, or cancel to remain in the cast location. When controlling the beacon, any enemies in your line of sight will appear as sandstorms. On paper, this ability may seem broken, but the beacon has a low health pool and can quickly be destroyed. So while the area Serket can cover will decrease as you climb the ranks, even spotting a single enemy’s location is incredibly advantageous.
Serket’s Gold Dust Woman releases a dust tornado that moves forward and slows enemies caught in it. The tornado can also be manually stopped to temporarily block a sightline. Serket is also equipped with a projectile that pulls enemies toward the center. When caught, it’s very difficult for enemies to escape the pull, but landing it consistently has a bit of a learning curve. Outside of throwing it toward enemies you know are pushing through a corridor, Dilemma can also be used to pull enemies from behind cover before quickly lining up a shot. Though Serket may be a few steps behind her S-Tier castmates, she’s just one beacon HP or speed buff away from joining the elite Lancers.
A-Tier: Broker
Like Serket, Broker is another Lancer on the cusp of reaching the S-Tier ranking because of his excellent area denial, smoke, and explosive abilities. Broker’s Goddard’s Vengeance ability allows him to wield a rocket launcher that instantly kills enemies hit directly. While hitting a target dead-on may become more inconsistent in high-rank lobbies, it’s almost guaranteed to inflict a staggering amount of damage and the rocket can also be used to swiftly dismantle a defensive setup. So even if you don’t get your one before being eliminated, Goddard’s Vengeance will ensure one of your enemies leaves the gunfight battered and bruised.
Broker’s Smokestack Lightning is inarguably one of the most versatile smokes in FragPunk because it’s thrown and casts smokes along the flight trajectory, even after bouncing off walls. Though Smokestack Lightning is an insanely useful ability that can be used to cover or obscure just about any area of the map, the prevalence of recon abilities can quickly detect your push. Broker’s final ability, Cherry Bomb, is great for denying space, and though the bombs are easily destroyed and avoided, the info gained when enemies fire at or run through the bombs makes it worthwhile.
A-Tier: Zephyr
Were it not for the pervasiveness of traps and recon abilities in FragPunk, Zephyr and her stealthy kit would undoubtedly be S-Tier. Zephyr is an elusive Lancer whose Midnight Rambler ability grants temporary invisibility, at the cost of becoming unable to fire weapons without decloaking. Her second ability, Fade Away, casts a large zone that allows Zephyr to remain invisible indefinitely, so long as she doesn’t exit the zone or shoot her firearm. These two abilities used in concert can be incredibly lethal on sites, but her loud footsteps and traps remain a constant liability.
Thankfully, Zephyr has a built-in escape strategy in the form of her Get Back teleport beacon. Place a beacon before going for a stealthy backstab or aggressing on a site, and if your invisibility is running out, teleport back to quickly disengage.
A-Tier: Sonar
Sonar’s character design is deeply rooted in gathering information for you and your squad, but we’ve bumped her down to A-Tier because of her lack of mobility and reliance on team follow-up. Sonar’s Echolocation deploys a sensor that scans for moving enemies every few seconds. Though Echolocation is an undoubtedly powerful recon ability, it can be gamed by walking between the sensor’s scans. Nevertheless, at a minimum, Echolocation will slow enemy pushes and make their movements easier to predict.
Sonar’s Sonic Surge is another recon tool that launches a charged-up sonic wave that exposes all enemies hit and knocks them back. Because Sonic Surge can travel through walls, it’s amazing at gathering intel on enemy setups. Finally, Sound of Silence dampens your footsteps and the steps of surrounding teammates for a very brief period. The shortness of this ability’s timer makes it near useless in solo queue, but when on a coordinated squad, the silent pushes can be fight winning.
A-Tier: Corona
Corona’s kit is arguably one of the most harmonious in FragPunk because all of his abilities are meant to be used in concert. Corona’s Fast Lane is a quick dash that allows you to swiftly reposition between cover, but it’ll often be deployed just after casting Hothead. Hothead transforms Corona into a flash that briefly blinds all enemies looking at this Lancer. Corona players will time their Hothead flash, dash into line of sight, and blind all nearby enemies.
While this combo can be round winning, it tragically leaves Corona in no man’s land unless he has team follow-up. Corona’s last ability is Ashes to Ashes which creates a spell field that damages enemies, and grants Corona damage reduction and increased movement speed while in the zone. Though Corona sits in the A-Tier, he’s one of the best 1v1 duelers in FragPunk, making him a major asset in overtime matches.
B-Tier: Jaguar
Despite receiving a buff in a recent balance patch, Jaguar remains a B-Tier Lancer simply because there are Lancers that outmatch each of his abilities. Jaguar’s Live Wire trap deals an impressive amount of damage but not enough to secure kills, and it doesn’t reveal enemies unless you also use his I Can See for Miles skill. I Can See for Miles detects the number of enemies directly ahead, enemies on critical HP, or opponents affected by Live Wire or Electric Avenue.
Electric Avenue summons a cage around enemies scanned by the cast ability, but again, you’ll only be able to see the enemy inside if you use I Can See for Miles. Electric Avenue also lacks agency because it’ll automatically surround the nearest enemy in range. This isn’t always advantageous as teams can strategically bait your push before entering or exiting the cage.
B-Tier: Axon
Axon is one of the most aggressive Lancers in FragPunk, but like Zephyr, his kit is heavily reliant on the enemy team being distracted or lacking recon traps. Axon’s Electric Guitar deals a hefty, yet inconsistent amount of damage, but you’ll need to get into close-range engagements for it to be effective. Sticky Fingers are Axon’s grenades which can stick to targets or bounce off the environment, making them decent when you know an enemy’s precise location, but they rarely get value otherwise.
Axon’s final ability, Super Freak, is unquestionably the most niche in FragPunk because it makes him immune to flashes. While many believe Super Freak becomes near useless when facing off against a squad with no blinds, that isn’t necessarily the case. Super Freak can still get value if you throw flashes and quickly swing toward your enemy to blind them without getting flashed yourself. Despite Axon being one of the more fun and high-octane Lancers in the cast, a skilled marksman like Hollowpoint will decimate him on maps with long sightlines, so stick to running him on maps with tight flank routes.
B-Tier: Chum
To be clear, Chum is still a perfectly viable pick in B-Tier, but his reliance on his bestie Chomper places him at the bottom of the list because Chomper can be destroyed relatively quickly. Chomper is a deployable friend who can patrol a given area, enter Explosive Mode to chase down enemies, or enter Smoke Mode to release a controllable stream of smoke.
Chomper enters Explosive Mode when fed Chum’s Explosive Bait trap, and enters Smoke Mode when fed Smoke Bait. Smoke Bait can also be thrown to create a smoke cloud when the projectile hits the ground. Smoke Mode Chomper can be rather effective, but you’ll become vulnerable while controlling him, so be sure to get coverage from your teammates. Lastly, Chum’s lack of mobility options make him one of the easiest Lancers to isolate unless you keep Chomper by your side and limit your playmaking.
For more FragPunk guides, check out our explainer of FragPunk’s ranked mode, plus How to Get Ultimate Material, and How to Slide in FragPunk!


